Buffet Table Layout: Two Measured Plans for Twelve Guests
Choose a wall-side or island buffet layout for twelve with measured dish zones, a counted equipment list, separate drink and return stations, and refill checks.
Compare the buffet layouts ↓- The guest list
- 12 people, including the hosts
- A little preparation
- Lay out the empty dishes and walk the route before preparing the food
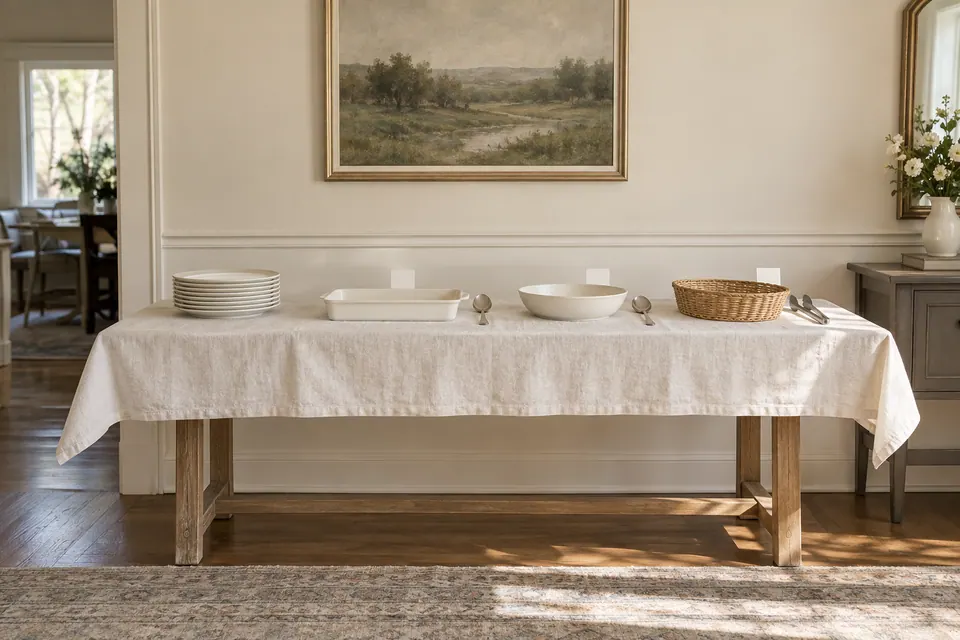
A useful buffet table layout starts with plates, then food, with drinks and used dishes on different routes. Decide whether guests will serve from one long side or from two parallel sides before you set out bowls. The same menu needs different equipment in each arrangement.
These two proposed plans serve twelve people from three food positions: A, a main; B, a side; and C, bread or another small accompaniment. Dessert follows after those dishes are cleared. The diagrams measure the furniture and serving footprints, not a required room size or an accessibility standard. Use your actual dishes, guest needs and room to make the final choice.
Choose one line or two parallel lines
Use the wall-side plan when only the front of the table is available. One clear left-to-right queue is easier to explain than asking guests to reach between people at an inaccessible back edge.
Use the island plan only if both long sides are genuinely usable. It has two left-to-right lines, each offering smaller first servings of the same A, B and C foods. The example keeps the same vessel footprints in each row; divide the total food between them and the refills. Twelve guests do not become twenty-four portions because you opened a second line.
| Decision | Wall-side buffet | Island buffet |
|---|---|---|
| Example table | 72 × 30 in, about 183 × 76 cm | 72 × 36 in, about 183 × 91 cm |
| Guest route | 1 line along the front, left to right | 2 parallel lines, both left to right; exits merge beyond the table |
| First plate stacks | 1 stack of 12 | 2 stacks of 6 |
| Food in service | 3 vessels: A, B and C | 6 vessels: A, B and C repeated for the other side |
| Refill access | Pause the queue; replace from the open right end | Pause both lines; replace from an open end |
| Use another arrangement if | Guests cannot reach the actual food comfortably from the front | One long side is blocked, or the merged exit conflicts with a doorway or seating |
Crate & Barrel’s buffet-hosting guide discusses leading with plates and choosing a circulation route. The measured vessel positions and two-line equipment comparison below are our own examples. A larger or taller display is not automatically a better route.
Wall-side layout: keep the front edge usable
The drawing uses a 72 × 30-inch tabletop against a wall. Measure from its left end for length and its back edge for depth. All four main positions share a depth center of 15 inches. Small menu labels sit behind the food, and the spaces beside the dishes are for their serving utensils.
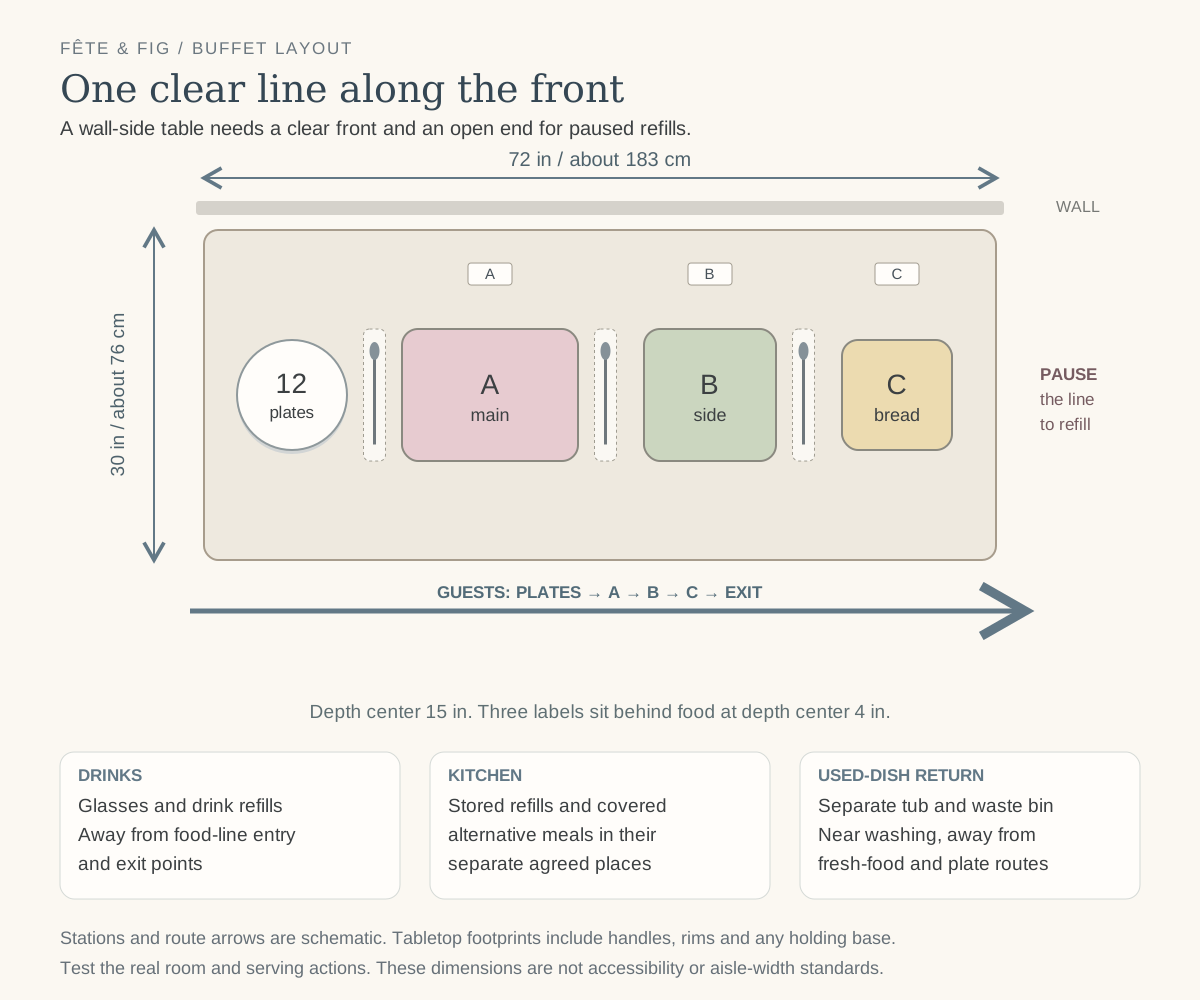
| Position | Outside footprint | Center from left end / back edge |
|---|---|---|
| Plate stack | 10 × 10 in | 8 / 15 in, about 20 / 38 cm |
| A: main serving vessel | 16 × 12 in, about 41 × 30 cm | 26 / 15 in, about 66 / 38 cm |
| B: side serving vessel | 12 × 12 in, about 30 × 30 cm | 46 / 15 in, about 117 / 38 cm |
| C: bread or small accompaniment | 10 × 10 in, about 25 × 25 cm | 63 / 15 in, about 160 / 38 cm |
| 3 utensil landing zones | 2 × 12 in each, about 5 × 30 cm | Length centers 15½, 36½ and 54½ in; all 15 in from back |
| 3 menu labels | 4 × 2 in each, about 10 × 5 cm | Length centers 26, 46 and 63 in; all 4 in from back |
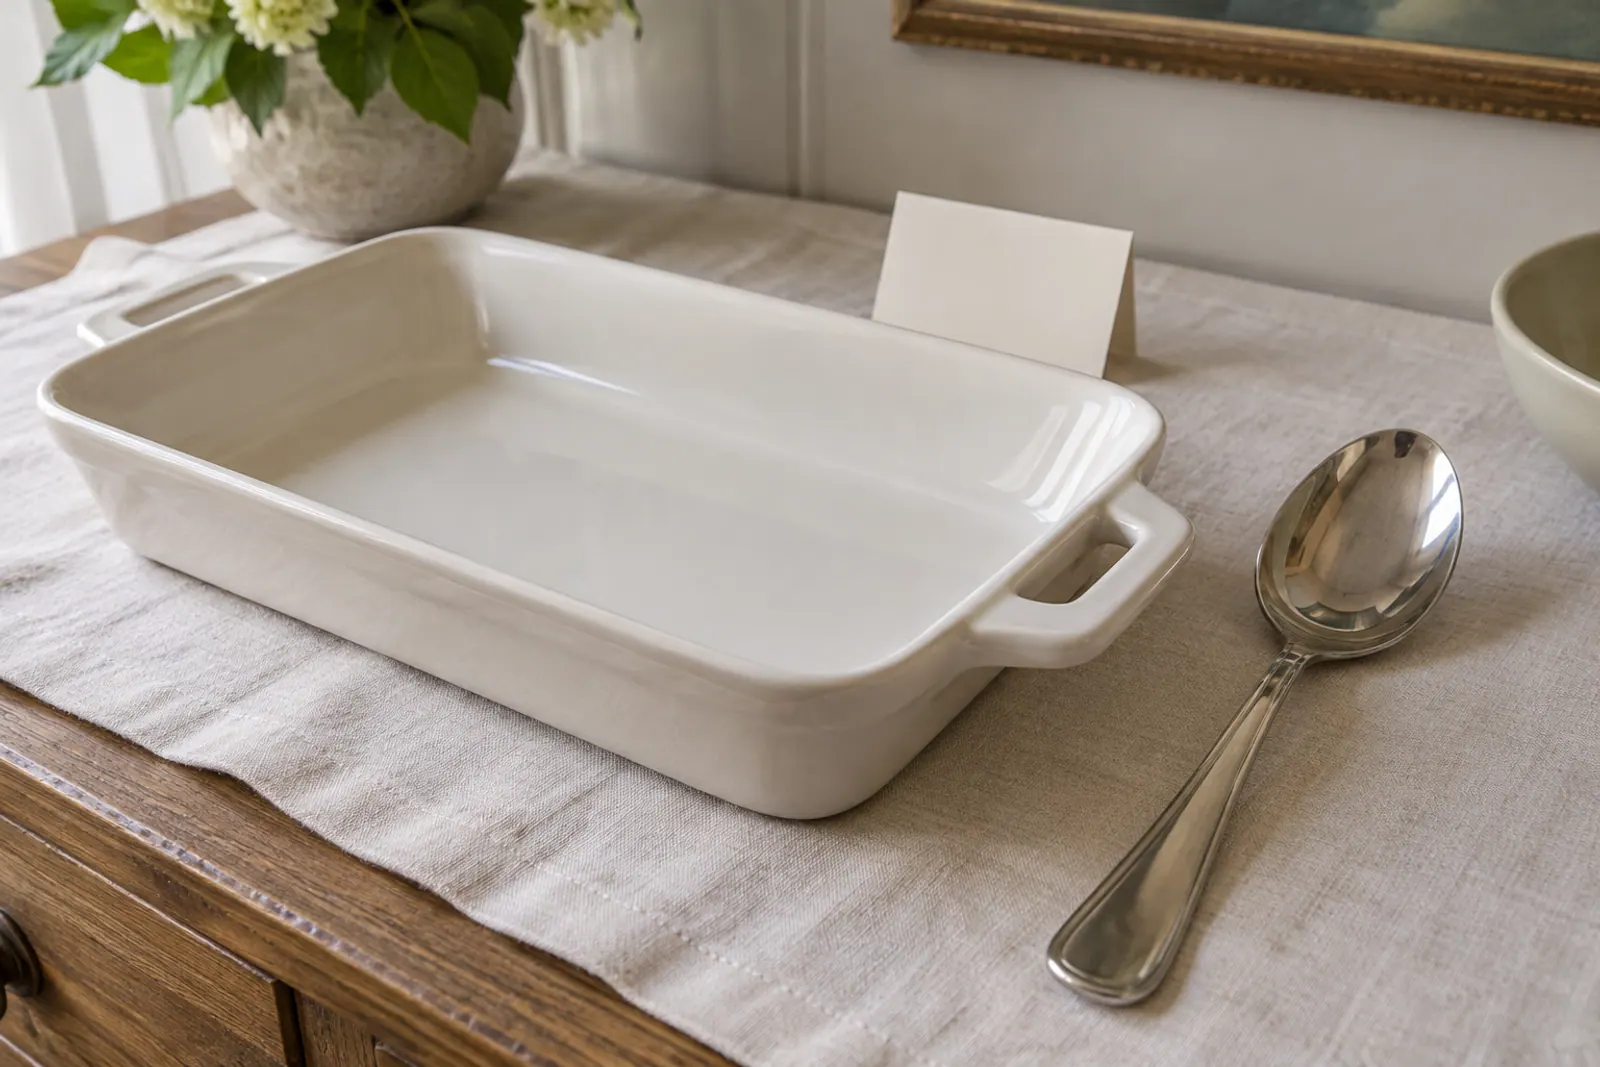
Rims and handles count in the footprints. A platter sold as “16 inches” may exceed that length once its handles are included. Measure its widest outside edges and open any lids before choosing the plan. The reserved utensil zones describe space, not a requirement to buy spoon rests; test the actual spoon or tongs there.
Keep the dishes low enough to see and serve. A label behind the food should be readable without lifting a plate over someone else’s hand. If a guest cannot reach a dish comfortably, bring a suitable serving to them or change the layout. Do not move a hot pan to the edge simply to shorten the reach.
Island layout: duplicate dishes, not portions
This example uses a 72 × 36-inch table with a service row centered 9 inches from each long edge. The length positions are the same as the wall-side layout. Each row has its own plate stack, three food vessels, three utensils and three labels, so guests do not need to reach across the island for the other line’s spoon.
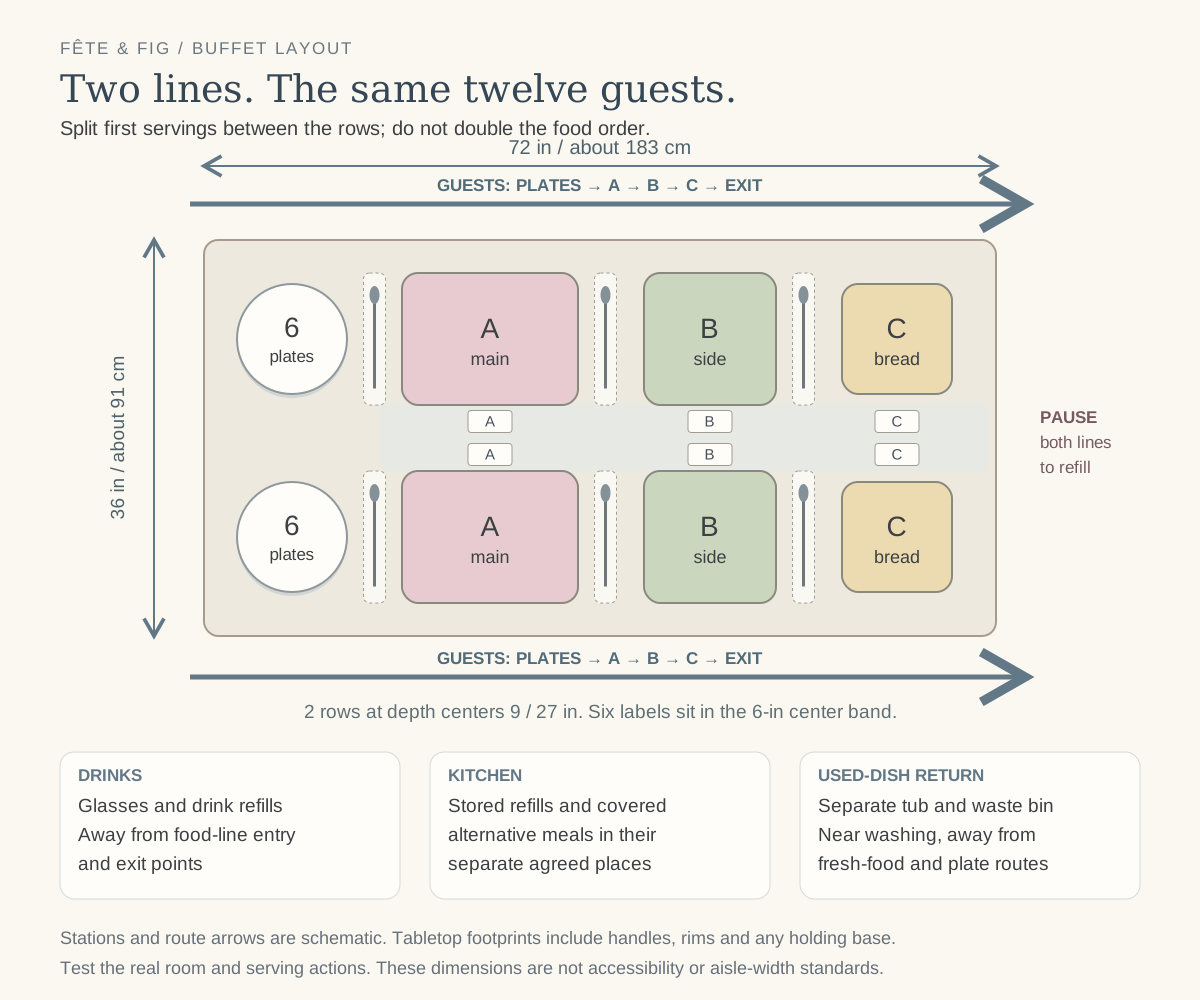
| Element | Measured example | How to use it |
|---|---|---|
| Two service rows | Depth centers 9 and 27 in from the same long edge | About 23 and 69 cm; each row is 9 in from its nearest edge |
| Plate stacks and food | Length centers 8, 26, 46 and 63 in in both rows | Use the same 10 × 10, 16 × 12, 12 × 12 and 10 × 10-in outer footprints as the wall plan |
| Utensil zones | 3 per row, centered at 15½, 36½ and 54½ in along the length | Each 2 × 12 in; 6 separate utensils in service |
| Center label band | 6-in band between the 12-in-deep vessel rows | 6 labels, 4 × 2 in each; 3 face each queue |
| Label centers | Length centers 26, 46 and 63 in; depth centers 16½ and 19½ in | Keep signs in the band without overhanging the food or blocking the opposite labels |
| Shared exit | Both rows finish beyond the right end | Check the merge in the room; invite the next guests only when the exit is clear |
The 6-inch band is a label area, not a reaching lane or a place to park extra bowls. If your serving vessels are wider than those shown, the band becomes smaller. Choose vessels that fit the measured space, or revise both rows before setting out food.
For either plan, the complete footprint must include any ice bath, insulated base or other holding equipment. Heating equipment also needs its manufacturer’s clearances. If it cannot fit, change the arrangement or serve that dish separately; these drawings do not model a particular warmer, electric cable or chafing flame.
Count the equipment for the layout you choose
Twelve main-course plates are in use, with two spares. Put the forks, knives and napkins at the twelve dining places before opening the buffet so guests can carry a plate without also balancing their cutlery. Water glasses wait at a separate drinks station. Dessert dishes stay off the food line until the first course has been cleared.
| Piece | Wall-side plan | Island plan |
|---|---|---|
| Dinner plates | 14: 12 at the start, 2 spares | 14: 6 in each stack, 2 spares |
| Forks, knives and napkins | 14 of each: 12 at seats, 2 spares | The same 14 of each |
| Water glasses | 14: 12 at the drinks station, 2 spares | The same 14 |
| Dessert plates and dessert forks | 14 of each, kept off the buffet initially | The same 14 of each |
| Serving vessels | 6 total: A/B/C in service and 3 clean replacements | 12 total: A/B/C in each row and 6 clean replacements |
| Serving utensils | 6: 3 in use and 3 clean replacements | 12: 6 in use and 6 clean replacements |
| Food labels | 3, one for each dish | 6, one per dish in each row |
| Transport and return pieces | 1 clean refill tray, 1 separate used-dish tub and 1 waste bin | The same 3 pieces, with clearly separate jobs |
| Timing and temperature checks | 1 timer and 1 suitable food thermometer, cleaned between checks | The same 2 tools, used by the assigned host |
If you use fewer spare vessels, plan how each used one will be washed and refilled before it is needed again. Do not borrow an in-use spoon from the other dish or line. The brunch menu guide supplies actual food quantities for several guest counts; this equipment list does not replace a menu’s ingredient or portion calculation.
The drink station layouts show two measured counters with pouring, refill access and cup returns. For the ice supply, the party ice calculator keeps measured drink ice separate from cooling bags. Neither changes the food-line portion count.
Give drinks, refills and returns separate jobs
Plan the sweet course separately from the main-food queue. Our dessert table ideas compare three measured surfaces, with quantities for the first serving and the reserve. Choose that plan before bringing the dessert plates out.
Keep the drink surface away from the food line’s entrance and exit. Place the used-dish tub near the kitchen route, where returning plates will not pass over fresh food or meet people collecting clean plates. Keep the waste bin beside that return point, outside walking paths. These stations can use existing furniture; their useful positions depend on your room rather than a fixed diagram distance.
Assign one person to refills and food checks. For a wall-side buffet, pause the queue before they approach the open end. For an island, pause both lines. Carry a clean replacement on the clean tray, remove the used vessel, and return it to the washing area. The used-dish tub and refill tray keep different jobs throughout service.
For food that needs temperature control, USDA advises 40°F or colder for cold holding and 140°F or warmer for hot holding, about 4°C and 60°C. Check food temperature. Without suitable holding, discard perishables left out more than 2 hours, or 1 hour above 90°F, about 32°C. USDA: Leftovers and Food Safety.
Keep small refill batches stored appropriately and replace used serving dishes with clean, filled ones instead of adding fresh food to the old dish. FDA: Serving Up Safe Buffets.
Write the time food leaves controlled storage on a kitchen note; changing its serving bowl does not restart that time. Follow the chosen recipe or supplier’s cooking, storage and reheating instructions. The route diagram cannot establish that a dish is ready or safely held.
Reserve alternative meals before opening the line
Ask guests privately what food and handling arrangements they need. Keep a complete agreed alternative meal covered in an appropriate kitchen storage area, with its own serving utensils, until it is brought to that guest. Count those portions within the twelve-person total. An alternative plate sitting beside the shared bread basket is not meaningfully protected by a handwritten label.
Keep ingredient packaging and accurate dish information available. FDA’s food-allergy guidance distinguishes ingredients and labeling from unintended allergen cross-contact. A separate position on the table cannot guarantee a meal is suitable; confirm preparation and serving arrangements with the guest and the person making the food.
The editable menu card can show dish names, but should not make an “allergen-free” promise you cannot support. For several contributors, the Friendsgiving planner records who is bringing each dish and what equipment it needs.
Walk the route with an empty plate
Try picking up a plate, serving from all three positions and leaving the line with one hand occupied. Check the farthest spoon, open lids, neighboring elbows and the point where two island lines merge. Include anyone’s mobility equipment in the real route check and offer table service where helpful. The tabletop measurements above do not establish an accessible aisle or turning space.
Then walk the refill route and the used-dish route separately. If any two jobs compete for the same narrow place, move a station or pause one movement rather than relying on guests to work it out. Use the garden brunch preparation checklist to assign these final room and service jobs before food is put out.
Put plates first, give each dish its own utensil, and move drinks and used dishes off the food route. A two-sided island needs duplicate serving pieces, not twice the total food.
Checklist from this story
0 / 8 ready